Deploying Your Store to Netlify
This guide walks you through putting the website we built for you live on the internet — hosted for free on Netlify, connected to your own domain, and updating automatically whenever we ship changes.
Before you start
You'll need three things:
- A GitHub account (free)
- A Netlify account (free)
- Your domain (if you already own one)
We'll send you an invitation to your store's repository on GitHub. Accept it before continuing.
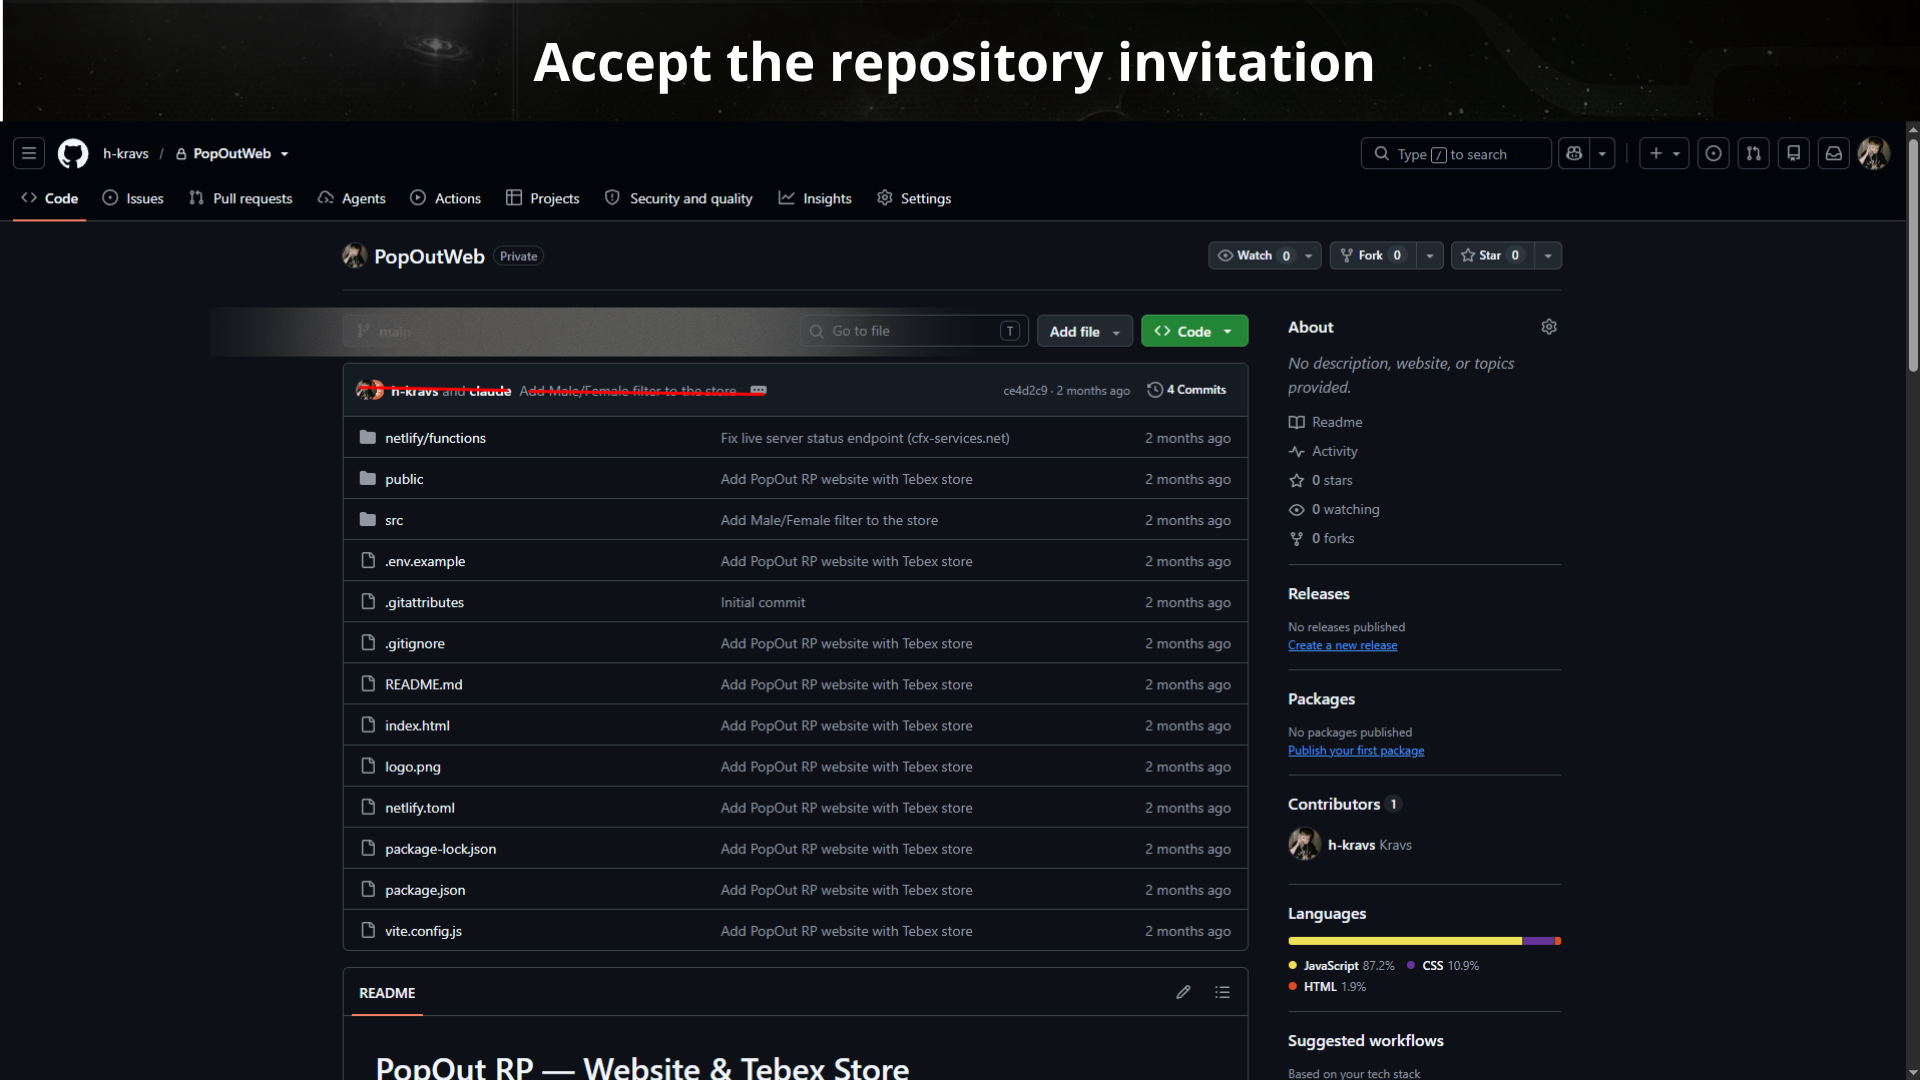
Step 1 — Accept the repository invitation
Open the invitation email from GitHub and click Accept invitation. You'll be taken to your store's repository, where all the website code lives.
You don't need to touch any of the code. The repository is there so your site can be deployed and updated automatically.
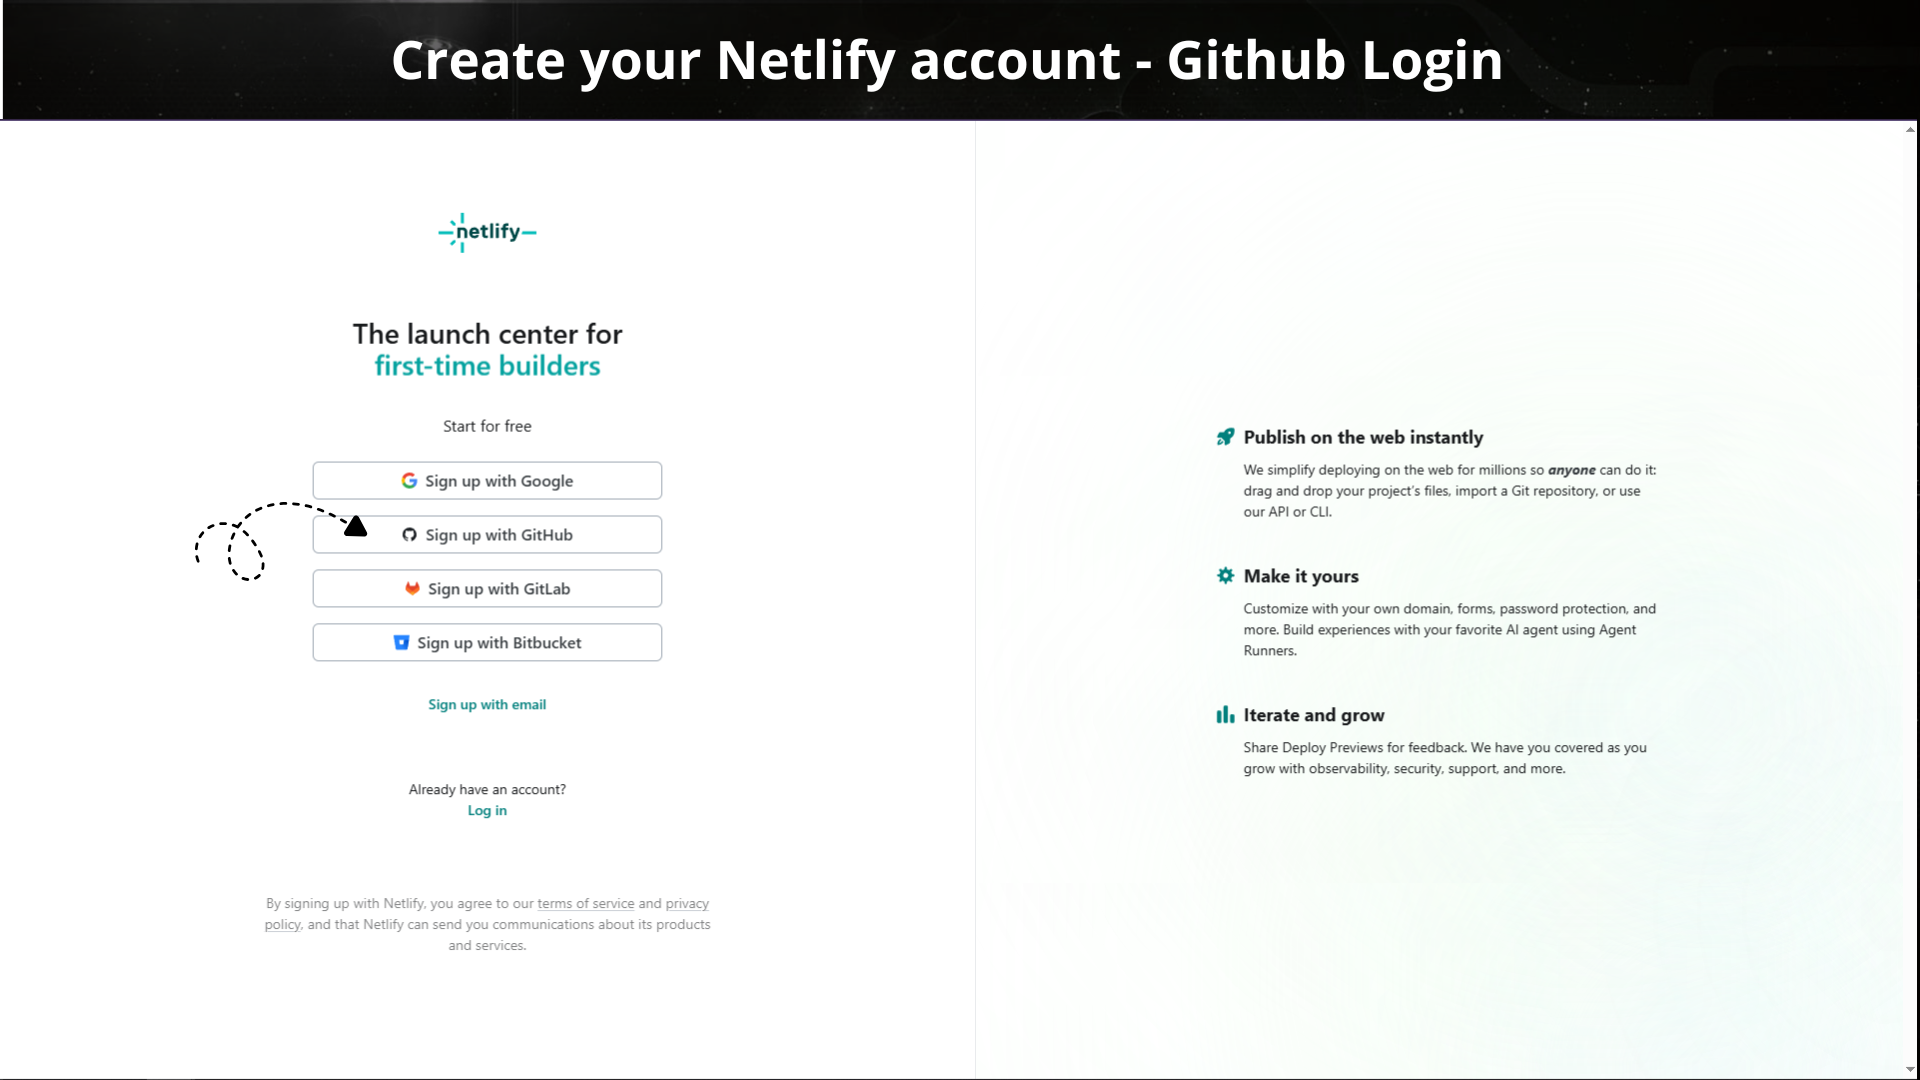
Step 2 — Create your Netlify account
Go to netlify.com and click Sign up. Choose Sign up with GitHub so both accounts are connected from the start. This is important: it's what allows Netlify to read your repository.
Authorize the connection when GitHub asks for it.
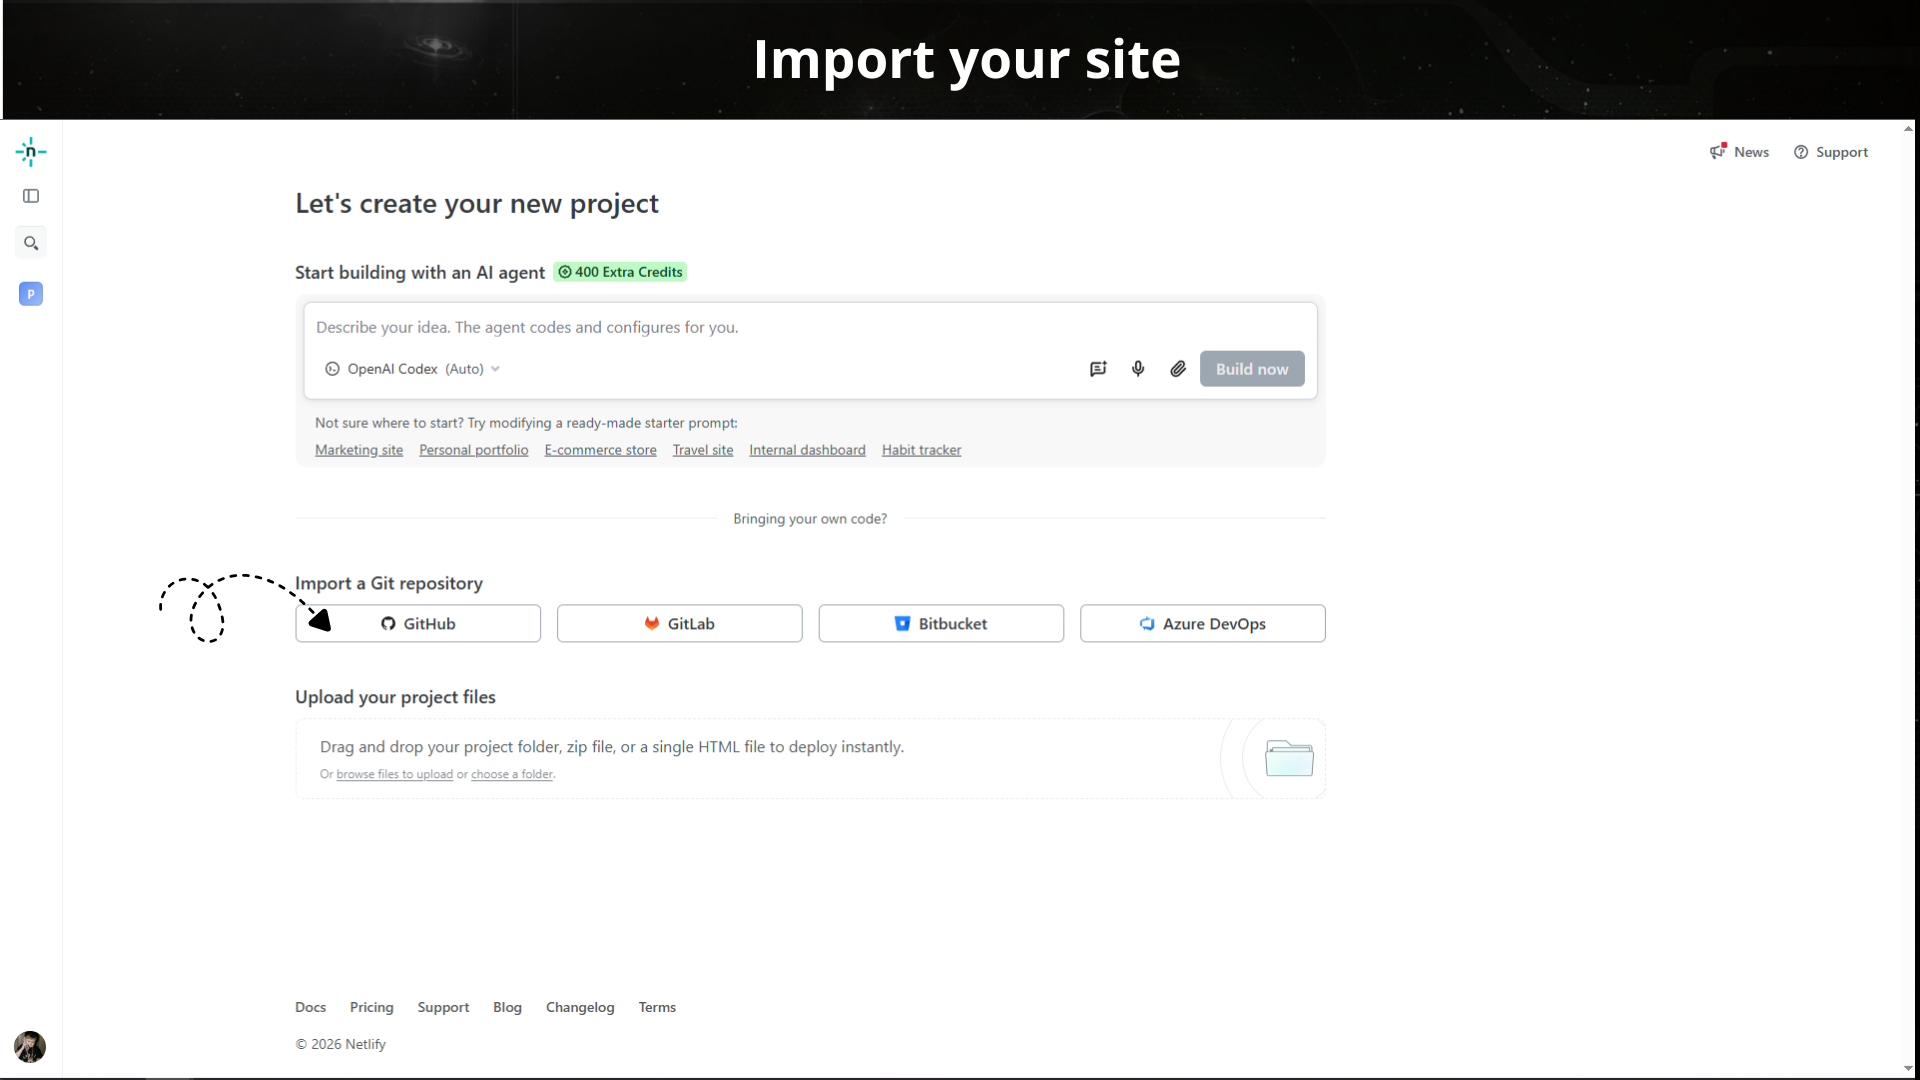
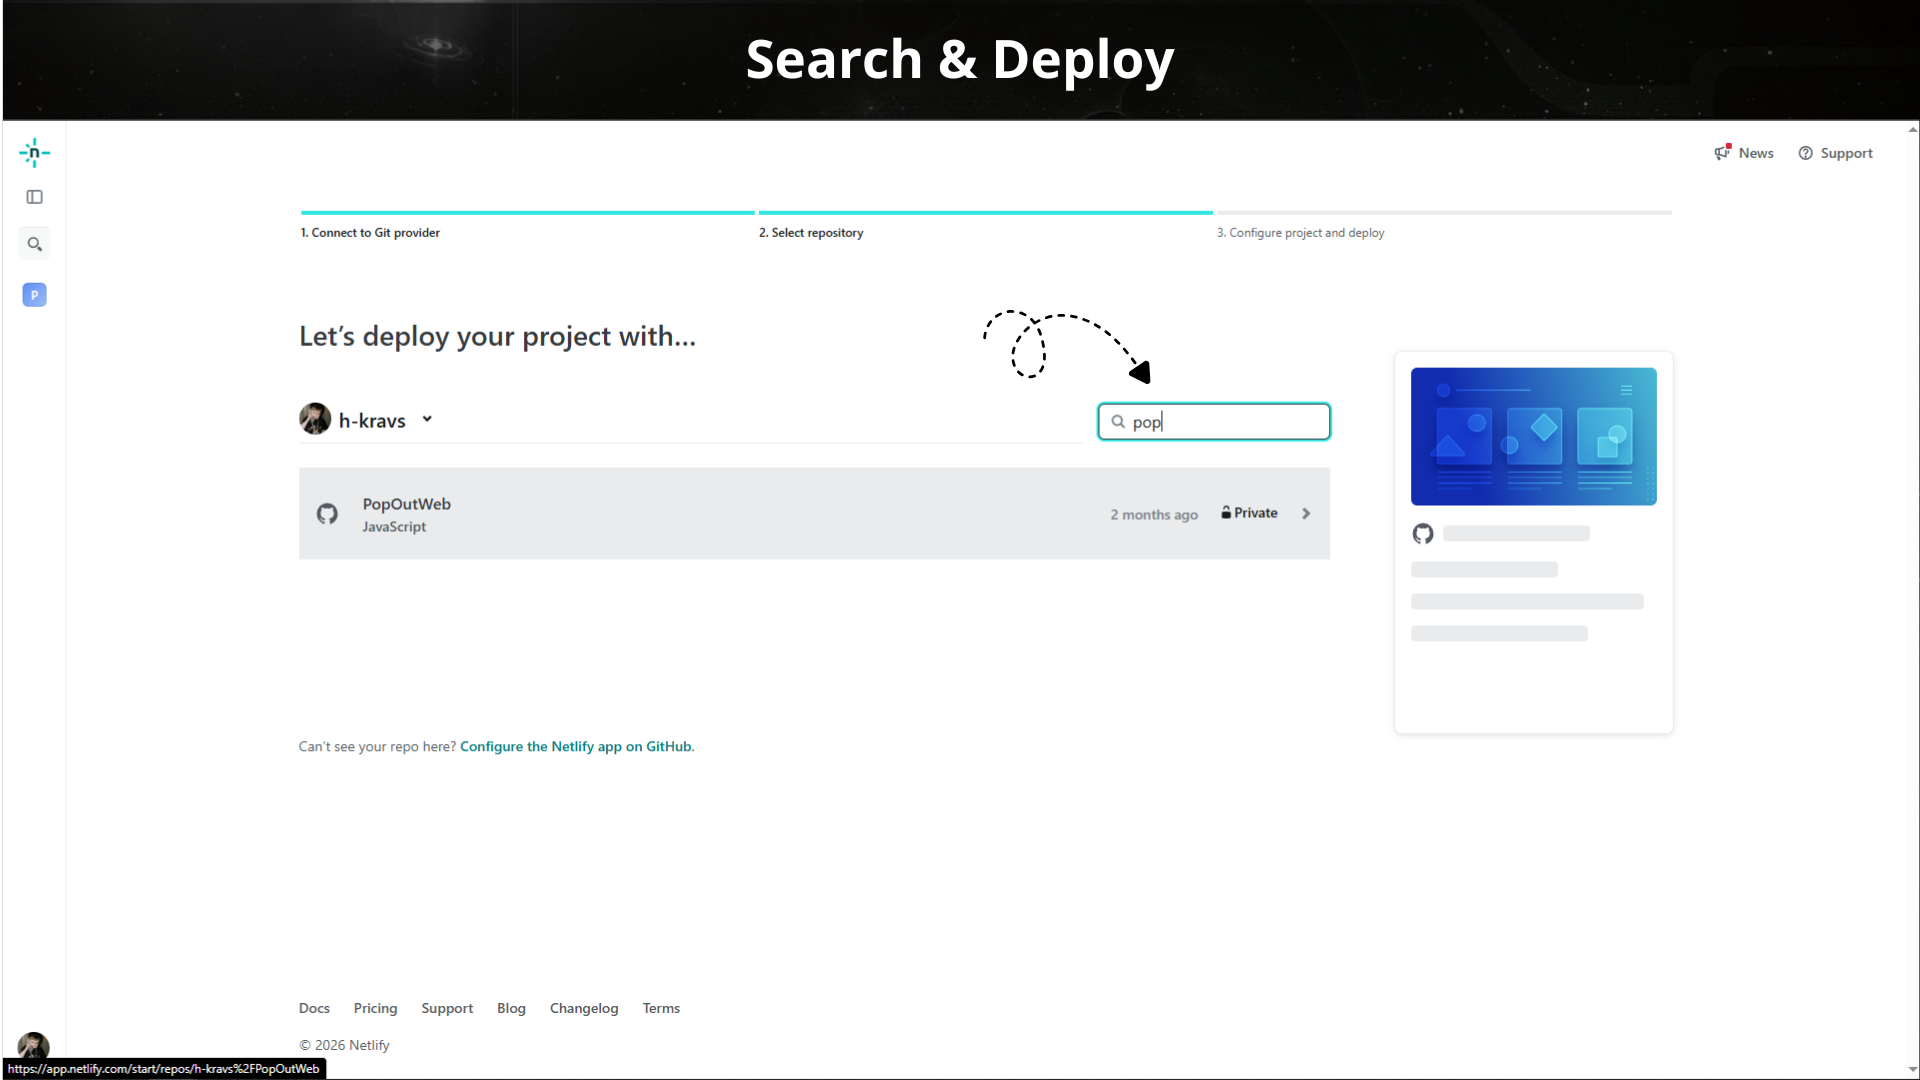
Step 3 — Import your site
Once you're inside Netlify, click Add new site and then Import an existing project.
Select GitHub as your provider. Netlify will show you a list of repositories you have access to. Pick your store's repository.
Step 4 — Set your environment variables
Your store reads its configuration from three environment variables. In Netlify, go to Project configuration → Environment variables, click Add a variable and choose Import from a .env file. Paste the block below into the "Contents of .env file" box, replace the values with your own, and click Import variables.
VITE_TEBEX_TOKEN=XXXXXXXXXXXXXXXXXX

# ─── Server links ─────────────────────────────────────────────────────
VITE_DISCORD_URL=https://discord.gg/yourserver
VITE_CONNECT_URL=fivem://connect/serverId
What each variable does:
The two server links have a fallback baked into your site — we ask for your Discord and connect links when we build it, so the site works even before you set them. We still recommend setting them here: it means you can change your invite or server address any time, without asking us to touch code. VITE_TEBEX_TOKEN has no fallback — the store needs it to load.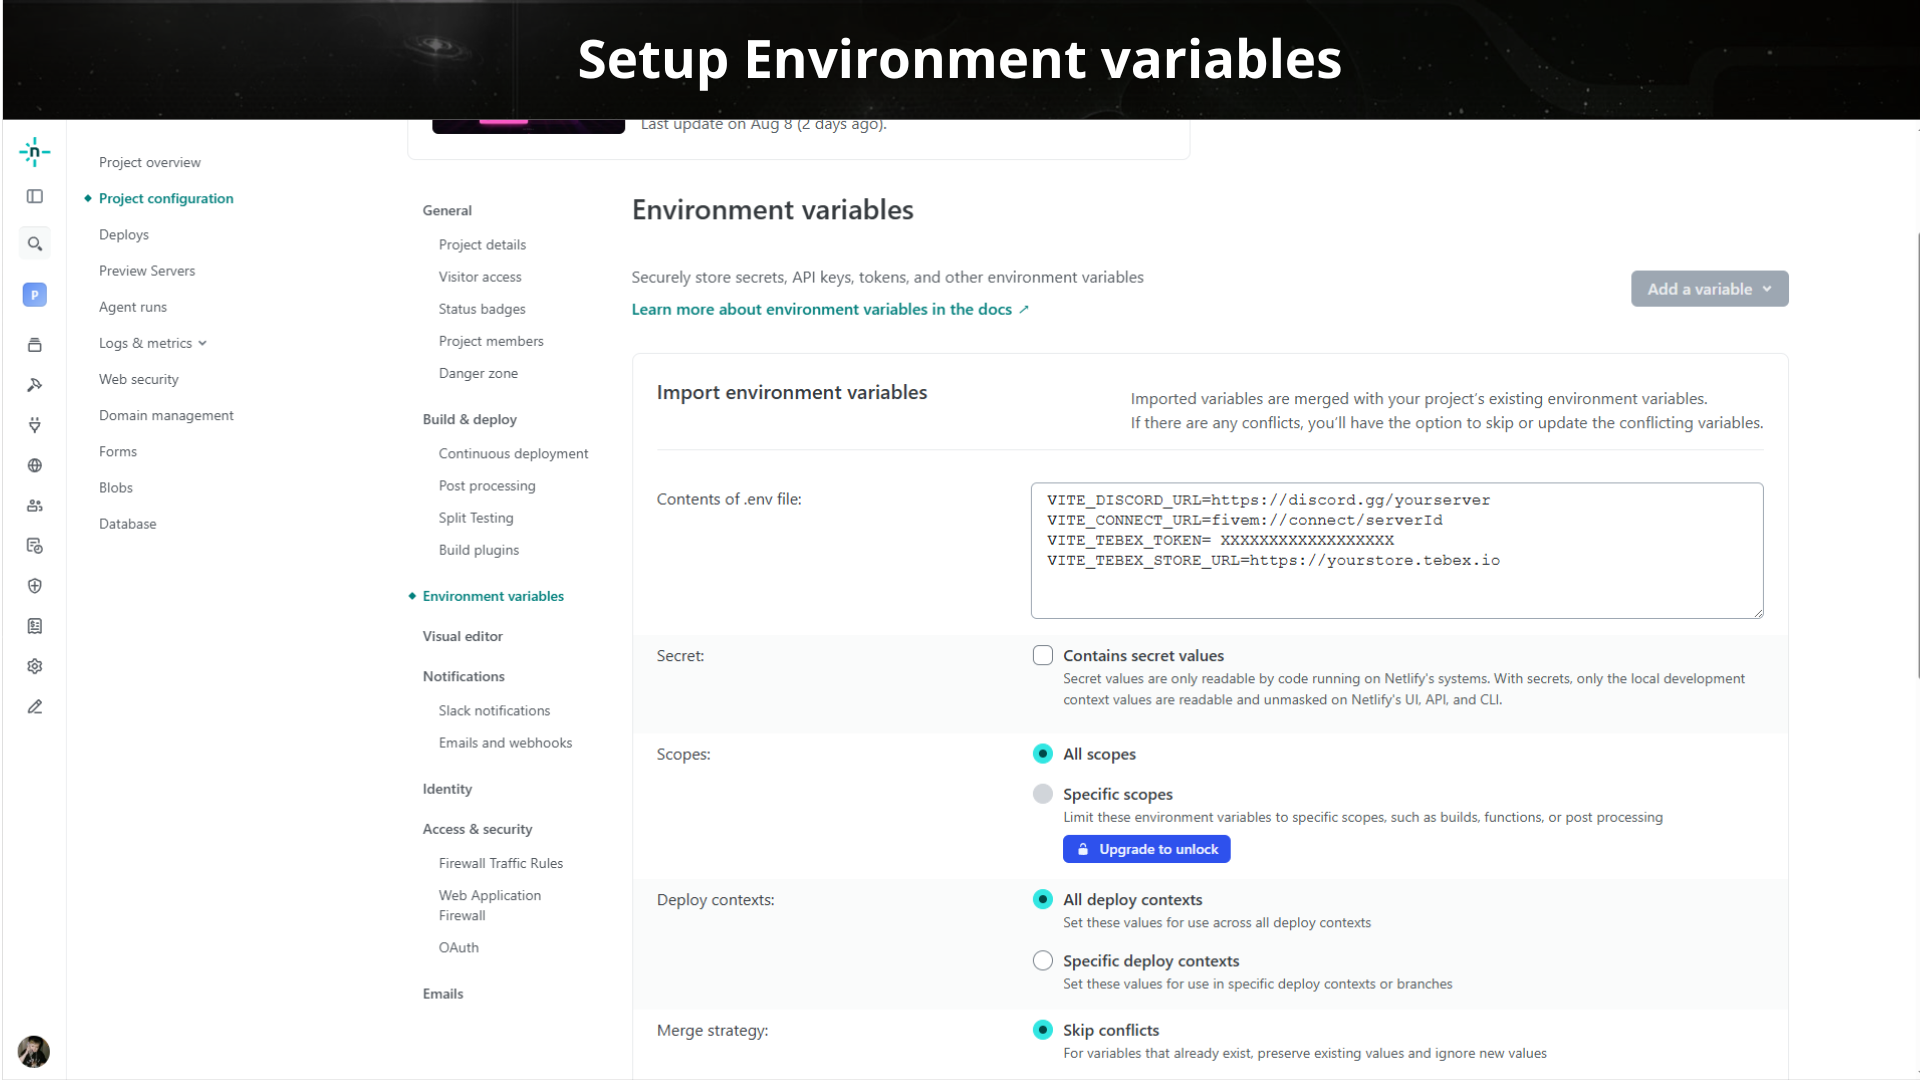
If your site had already deployed before you added the variables, apply them by going to Deploys and clicking Trigger deploy → Deploy project.
Step 5 — Deploy
Netlify will detect the build settings automatically. You shouldn't need to change anything here.
Click Deploy site.
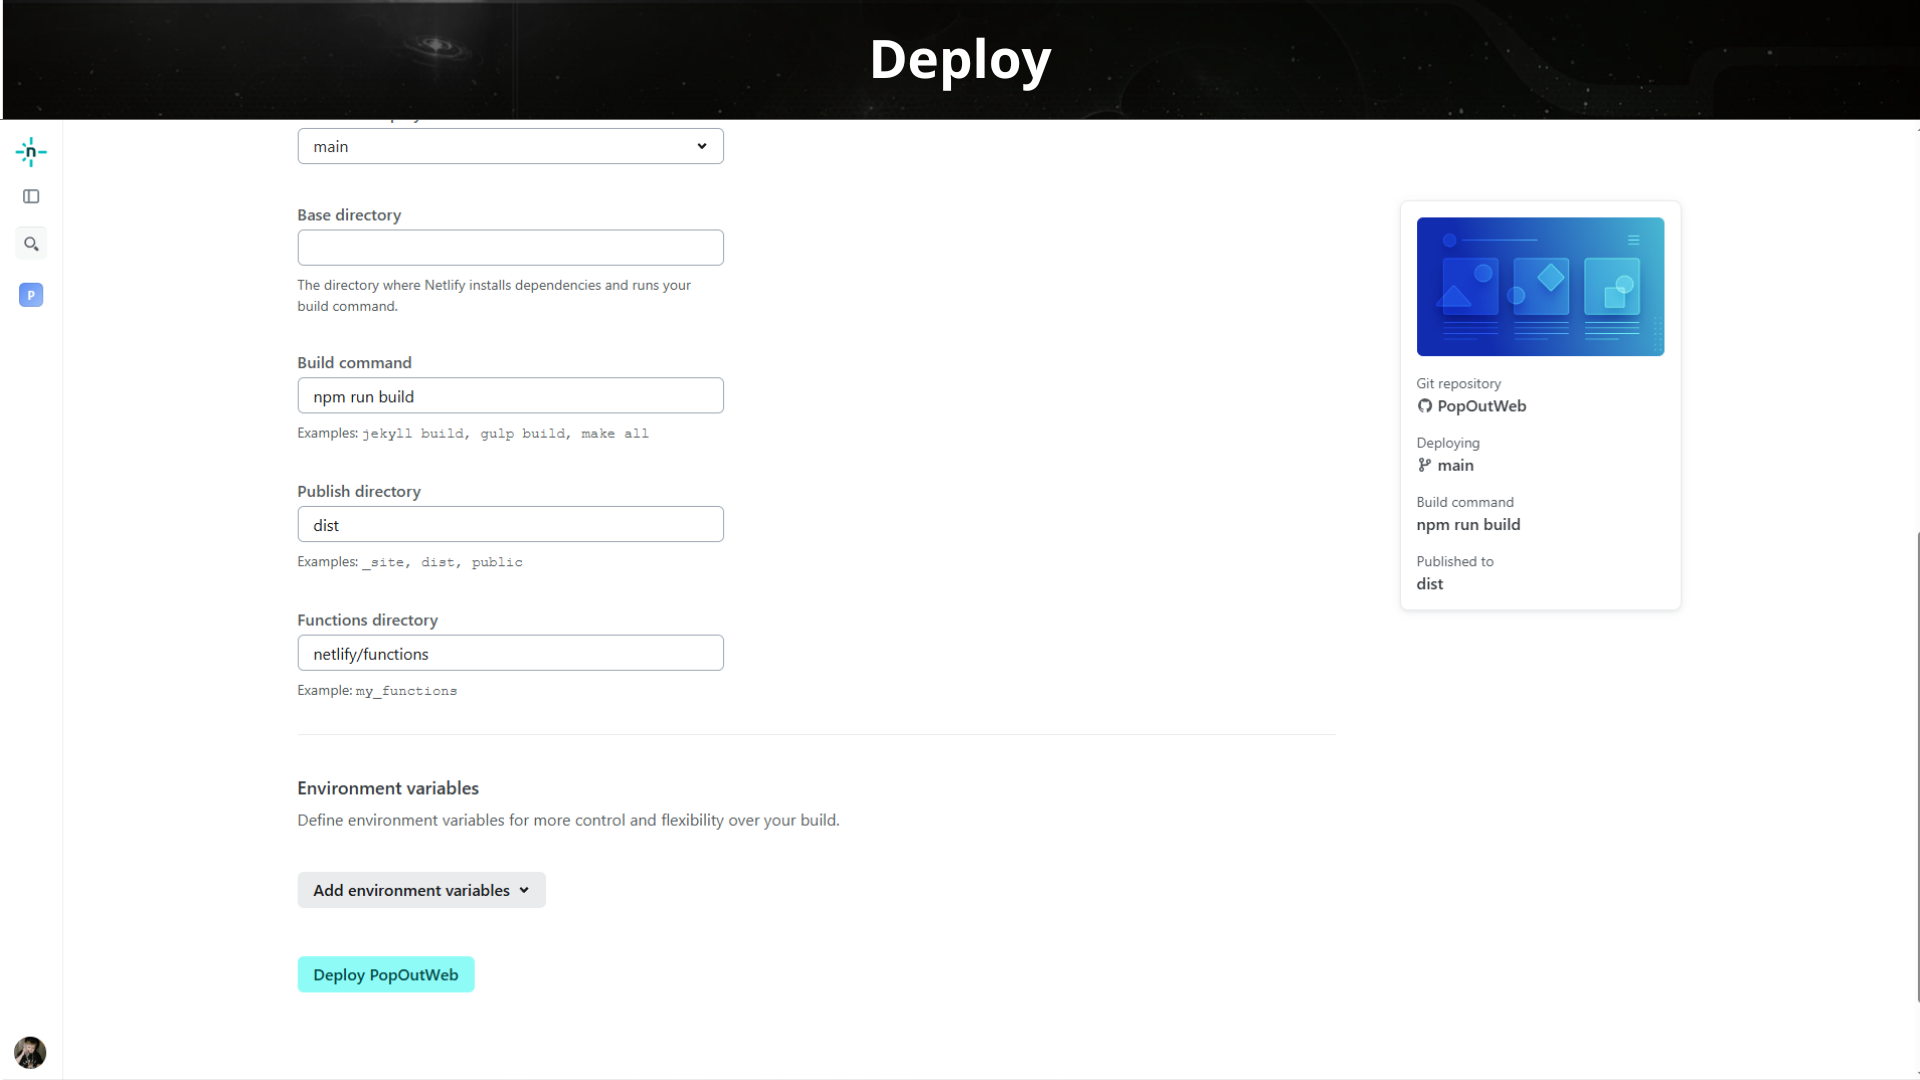
The first build takes a couple of minutes. When it finishes, you'll see a green Published label and a temporary URL that looks something like random-name-12345.netlify.app.
Your store is already live at that address. The next step is putting it on your own domain.
Step 6 — Connect your custom domain
This is the part where your store goes from a temporary Netlify address to your real domain.
The video below walks through the full process, from adding the domain in Netlify to updating the DNS records at your registrar.
A few notes while you follow along:
- DNS changes can take anywhere from a few minutes to a few hours to take effect. If your domain doesn't work right away, give it some time before assuming something went wrong.
- Netlify issues a free SSL certificate automatically once the domain is verified. You don't need to buy one.
- If you bought your domain somewhere other than Netlify, you'll be changing settings at your registrar (Namecheap, GoDaddy, Spaceship, Cloudflare, etc.). The process is the same everywhere, only the interface changes.
Updates
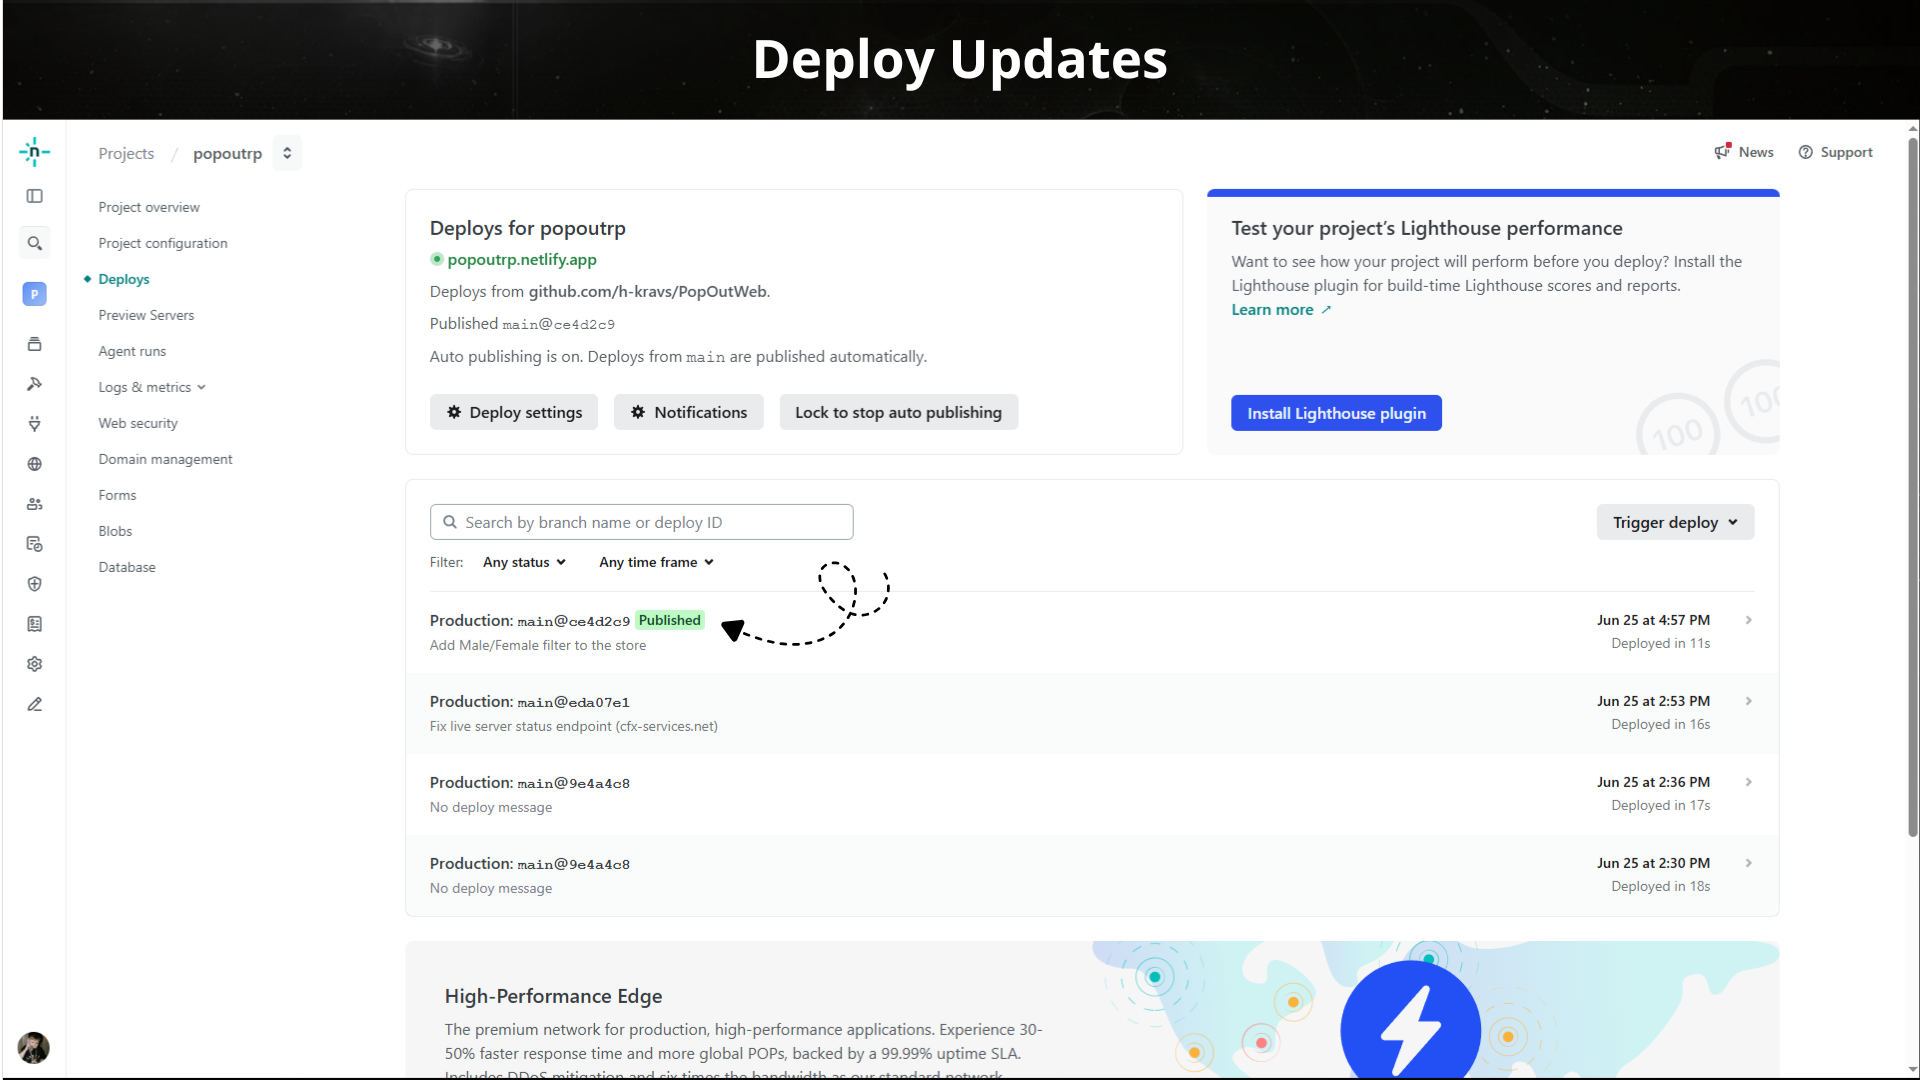
Once everything is set up, you don't need to do anything to keep the site updated. When we push changes to the repository, Netlify rebuilds and publishes your site automatically.
You'll see every deploy listed in the Deploys tab of your Netlify dashboard.
Troubleshooting
The build failed. Open the failed deploy in Netlify and check the log. Send us a screenshot and we'll take a look.
My domain isn't working. Give DNS changes up to 24 hours. If it's still not resolving after that, double-check that the records at your registrar match exactly what Netlify asked for.
I don't see my repository in the list. Make sure you accepted the GitHub invitation, and that you signed into Netlify with the same GitHub account.
Something looks wrong on the site. That's on us, not on the deploy. Reach out and we'll fix it.
Need help?
We're in our Discord — ping us any time.